 We are going to show you how to do a shed construction project right from scratch. We’re talking about digging out the dirt to putting the last coat of paint on and we use all the tools.
I’m wearing it right here. That’s. It anybody can do this and if you can build a shed remember you can build a house, so the most important part of building your custom shed is layout and design.
Remember the design world when we’re, designing something it has to function and it doesn’t have to just function for everybody. It has to function just for you. So what you need to consider is what kind of storage space are you creating? Now let’s face it in today’s world in North America we are a consumer economy, we got stuff, we got so much stuff.
We have garages attached warehouse, we don’t even put our car in it. We have sheds that are in that for gardening, and they’re, so full of stuff. You can’t even begin to pot any seeds in there anymore, so we need more space.
So the best way to do it is to build yourself a custom shed get some of the things out of your way like your lawnmower, so that you can use your other shed, get some room to store all your tools. So you can get your garage back.
This is the solution to a lot of your problems. So let’s. Talk about what to do when you’re thinking about building a shed first up, let’s! Talk about the space that you need to build, one it doesn’t seem to matter what kind of home you live in, no matter where you are in this country, you’re, going to need more space.
So if you don’t have a lot of yard space. You might find yourself building like a little addition on the outside of your house and just some simple swing doors that might be fine, but if you’ve got a property like this, and you’re gonna have lawn maintenance equipment and You.
Ve got a lot of hobbies and that sort of thing, then you need a lot more space. So if you have the room for something rectangular, I like to suggest that I like to have lots of doors in a storage area, because I don’t like it.
When you open the only door and you, ve got your lawnmower sitting right there in front of you, and all you do is pitch things into the corner, because you can’t get into the room, and that ends up just being A bunch of clutter mess right, so I like rectangles, and we have a building code where we’re from where we can go 10 feet by 10 feet by 10 feet high and we don’t need to get a permit for That because it’s, not a permanent structure, so that’s kind of the idea that we’re gonna work with today, we’re gonna build it a little more rectangular, 10 by 8.
But if you want to get something longer or more square or even make yourself a round Mongolian, you’re, the secret is you need storage and you. Ve got to keep it dry. So let’s. Talk about things that are in the backyard that are going to cause you problems and how to avoid them.
Now before we build, we need to plan, and there are four things you need to consider before you do that drainage, sound wind, and an all right. You want to do four things with your shed. You want to hide things that are unsightly.
You want to protect yourself from wind if you get too much wind and making something difficult to go, grow in your garden or you want privacy issues or like we have a schoolyard behind us. So, behind this property we’re, actually going to create the shed to be actually a sound barrier wall as well, which will be brilliant, no more kids screaming in school bells and taking up space in the afternoon.
And the other thing you want to deal with this drainage now. This is crucial because this will affect the integrity of the structure. Almost every house that’s built is built with the idea of drainage, where the water is supposed to be running away.
From the building collecting in ditches or culverts, or something like that and back here, we’re actually at the lowest part of this property. But on the other side of the fence, the drainage continues to go about another 10 or 12 feet, which means, even though we’re, a four-season climate and we’re gonna get thaw and free cycles.
We aren’t gonna have a buildup of water turning to to ice here. So when we build our shed as long as we pour our concrete on top of a stone pad, we’re gonna, be just fine and we’re, not going to experience all that heaving and cracking and breaking and tearing things Apart, so this is good to go so remember, drainage, wind, sound and ugly.
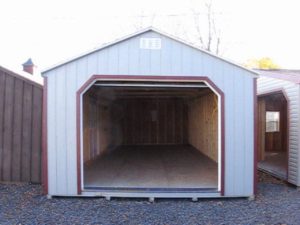
As long as you take care of all of those in consideration of what you’re gonna build, you’re gonna be just fine. Now, what we have here is a really typical kind of pre-built, shed eight by eight by eight it’s, got this double pitch roof! Let’s.
Just see alright yep there’s, the lawnmower and there’s. The – and this is all you have access to for space typical, and this might not be a problem for you. This might actually be the solution. You’re.
Looking for the secret here. Is this homeowner built it on those little two by two foot, two concrete slabs on gravel, but when you build it that way, you have to make it dead perfect, because this kind of prefab kits have no mercy.
If you don’t, have them exactly square and level and plumb. So just a word of warning: if you’re gonna get a kit like this, which runs a little over 500 bucks. If that’s, gonna be enough space to solve your problem, you’re gonna want to watch.
Step 2 of our program here just know how to pour a concrete pad, because that pad is going to save you a lot of time in aggravation. It took them almost three days to build this from one talking to him.
If he had the pad, he could have done it in an afternoon. So if this is enough solution for you, that’s a great word of warning my experience, no matter how big your stores’ area is, you’re gonna fill it.
So keep that in mind if this is going to be okay, maybe going an extra couple hundred bucks and learning how to build something twice as big might be a better solution. So just remember when you are designing your shed or your outdoor building, keep in mind the neighborhood look at the lay of the land.
Try to imagine what it’s going to look like when it’s. There you don’t want what you make to be a huge monstrosity. So in our design, we’re, actually going to do just a single sloped roof, and you can see in the background, if you put a big rectangle there with a single sloped roof, it’s going to fit in right, along with The line of that cedar hedge, you’re, not obstructing your sightline.
It’s, not going to look like a monstrosity from the other neighbors and around the corner, and so you’re, not going to get any kickback from your neighbors right. The other things for design. Think about using big barn doors.
Lots of access think about having a secondary door around the side where you can bring a lawnmower instead of DIN the middle off the corner. Alright, have one set of the walls set aside just for your lawnmower, if you tuck it away, and you only have to sweep a couple of feet every once in a while from the grass clippings it.
Ll, keep the rest, your shed nice and clean. I always like to say, put in a couple of simple windows, maybe something that opens up to get some airflow. I always like to pour my pad a little bigger than the building.
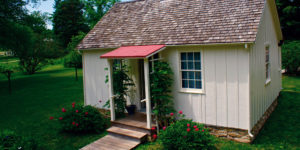
It gives it an outdoor storage space paper the opportunity for a little sitting area. If you have a view that would take in this sunset, it’s, just a thought and lasts but not least, think about some hanging.
Planters or window boxes dress. It up remembers it’s, a part of the home. It’s, just a little bit off the side. So if you make it look, pretty it. Ll actually increase the value of your property and it’s, not going to cost you that much a little bit of sweat equity right.
But we’re, going to show you everything you need to do stay tuned with us on the ride. So in this project, we are building a shed in the backyard and we’re, going to build it on top of a concrete slab.
So we thought that we would take the time to go through the process for making a concrete slab because there are a lot of things you can use when you know how to use concrete, you can make walkways and foundations for small buildings, and you can just Have like an unlimited opportunity to solve problems around your house with concrete if you know how to use it, it’s, also a great foundation.
If you’re building stairs or even going up and onto off the deck. So there’s, no limit to it right, but you got to get the process proper and this is what it’s all about today. There’s some science behind it.
And if you understand the science, then, if you run into specific problems, you. l know how to solve them too. So let’s get busy here. We’ve. Basically just do a no line here. It’s, an 8 by 12 slab that we’ve made here, and I do this just because I’m.
A visual guy. I’d, like to see what I’m gonna end up with, and now I can kind of use this layout here to identify my problems. So the process is simple. First, you have to have your layout. Second, you got to get rid of your organics because there’s, no sense building anything structural on top of grass.
It’s. Gonna end up rotting and everything. Gonna be moving around and you’ll get a big crack in your concrete. You don’t want that, so we have to remove our grass get these stones out of the way we have to build a frame.
We have to level the frame we want to introduce gravel because we need drainage. We can use that to level everything off. Then we’ll get into the mixing of the concrete, and then we’ll deal with how to finish it off.
So you get a decent look now in this video. We are not going to be approaching this as professional concrete installers. I am NOT one. I work with concrete a little bit usually just fill in holes in basements, but in this video, we’re, going to show you how to use some of the basic tools you have at home so that you don’t have to spend a fortune in order to get into the concrete business here we go so basically we just have a few basic garden tools.
I’m, pretty sure everybody has these if you own a house for the backyard. Otherwise, you wouldn’t have much need for a pad, so we. Ve got some stone shovels and this is my little garden shovel. This is great.
It’s for edging, but this does a really nice job of getting the sod removed. Ok, I’m, just a thought. If you have a lot of sod and is really thick grass, you need to remove it. There is a sod-cutting machine that you can rent and it drops the blade in there and does a really quick job.
It can be a little bit of a pain in the butt, picking it up and cleaning it and taking it back. But if you’re doing a large area, it makes a real, quick work of that. Next, we’re gonna need this large tooth break.
This is for moving our gravel around, of course, a level and then various shovels, because we have sloped. Almost every yard has got a kind of slope. So you’re, going to be moving. Some dirt can’t get away from that, and then that’s, really it’s, not that tricky.
The only other secret weapon we have here today is we have a concrete mixer who is not mixing concrete in a pail. If I had done 50 bags, I would probably go through a dozen pails the little technique I use of mixing concrete and a pail for filling a hole in the basement.
Doesn’t work here, unfortunately, because, after the third or fourth bag, the pail blows up. So we’ve gone out and picked up this little handy dandy, homeowners version of a cement mixer it’s one bag.
At a time, we’re gonna put it through the wringer today and see how well it works. Hopefully, it lasts the whole day and we don’t run into problems and, of course, our tools are in the description below.
If you want to take a look – and we have an awesome wheelbarrow over here – I don’t know where max got this thing. It’s got two tires on it. I love it. It just seems to make the whole process a lot easier for moving things around now.
There’s, not much else to do other than talk about the fact that we have to get dirty it’s hot today, I’m gonna be a mess, so let’s just get to the Chase time to get dirty so like a lot of jobs, step one of your projects, it’s, always preparation.
So what we need to do is remove our organics and our stones here out of our way so that we can have a nice compacted gravel base. So we’re gonna just get dirty and roll this up and get it out of here, and we’re going to start by trying to salvage these big blocks because I would like to use these as a ramp.
Later from my lawnmower so that I can open up a side door and push that lawnmower into the back of the shed instead of coming through the front door, all the time and getting everything dirty. That’s, a great way to lift the rock sweet.
So when you’re, removing sod remember the roots, for the grass are actually what you want to get rid of. So you’re. Looking for about an inch to a quarter and that’s generally, what was left after we pulled those big stones out of the way.
So all you do get this little garden rake now! Look at this once you’re underneath the roots, everything comes up: real nice and easy that’s. Not that tricky. Is it that’s? Why the beauty of this straight blade right that does it all the work for you? You, don’t want to fight it from the top because you’re trying to cut through all the roots.
Here we’re. Just separating this root material from the dirt [, Music, ], okay, so we’ve got rid of our organics, and now we are just trenching the front of the pad this is it the high side and it’s just a matter Of creating a hole because we’re on a hill, and I’m using these five-quarter boards.
As my framing I’m gonna stick this in, I want to be able to drop it in so that my concrete finish is just a little bit above the grass and then I’m gonna level off the box. Okay, now the sides don’t need to be leveled off, but the front the back sure do, because we’re gonna use a 16-foot board discrete our concrete later we’ll.
Show you that, but in order to get this level and get our concrete as close to the grass as we can so, we’re, not building out of the ground. We’re gonna dig a trench here set in our board and then we’ll, screw it all together and level it off.
One of the advantages of building a shed and clearing is we’re not running into too many roofs. Keep in mind. If you’re near a larger tree, you might need to have yourself a Sawzall tool handy to cut through some of these.
As you go set this in perfect. Now it’s, just a matter of setting the right height. So we’re at the point where we & # 39. Ve got our organics taken care of we & # 39, ve got our trench built. This is gonna, be our front.
Ridge board now really want to take a look at the slope of your ground. Here start at your high point on the front of the pad and the reason being when you do get heavy rain and the rains gonna be coming following the grade of the property towards your pad.
It’s, nice! If your pads a couple of inches higher than the grass it’s, easy to trim when you’re cleaning up your grass work, but it’s. Also, nice to divert the water around the sides, and so it doesn’t, come over the edge of the pad and then try to infiltrate the structure that we’re gonna put on top of this pad because we’re making a shed.
We just want to think through what happens in extreme weather, so we don’t run into problems with off, recycle, and crazy storms, so having it, elevated is gonna be really beneficial. So this is our hi side.
So we’re gonna establish our point here about two inches above the grass we’re gonna use one of these right there in my corner – and I like that – and this is basically going to be that’S it that’s, gonna be the height of my pad off my patio.
I’m about two inches there. I think I like that. Now we’re, going to level all the way across the front, using three bricks and our big level here, and then we’re going to level the back okay. Now the sides we’re just gonna screw together to hold it all in add some stakes and then we’re, ready to start doing our backfilling.
But first of all, let’s. Just go over to the middle here. Obviously, I’m Way too low here. So I’m just going to put in a little bit of dirt, lift that up see if that works, and now I can go, and now I see how much I have to raise this up.
Wow, that’s, pretty substantial Jenna! Do finally, we have more than we need. I’m, just gonna wiggle this around until we get it down to where we want it perfect. Now, just a quick note, the longer your level, the more accurate is gonna read, especially when you’re dealing with lumber.
This is a six-foot, so this works really well in a lot of cases. Ah, so now that we have that level, I’m. Just gonna put up the sideboards there on one screw on each end. Just to keep the joint closed.
Now we’re gonna go set up at the backside. Do the same thing there only this time we’re, going to use one of the 16-foot boards and we’re gonna level from the front side to the backside and get this all squared off as well.
So we & # 39. Ve got our 16 footboards here, and this is almost one of these situations where you want three hands. I’m gonna lift this board now and I’m going to find out roughly how much I have to build up before I get too crazy there we go that’s level.
Amazing, Hey Wow! Just a little bit more than that brick standing on end that’ll. Give you an idea of how much build-up we have to have back here. I’m, expecting a little bit of weather to get in the shed, so be nice if it had a little bit of a drainage effect off the back end.
I am about 3/8 of an inch lower than I should be right now that’s a little bit much so when I put the level on I knew I had to bring this board just a little bit higher than that. So I don’t really need this board right at the moment.
What I’m gonna, do let’s, just lift this board up flush and then a little bit and drive a screw in to set the corner. Okay, now we’ll, go check the other side. That is actually crazy. That’s a little bit too high Wow Wow yeah.
That just gets crazy. So you can see we just finished off figuring out that our level is way up here. Almost eight inches off the ground, that’s gonna involve way too much aggregate and way too much work to fill this hole.
So what we’re gonna do is we’re gonna go back to the beginning. We’re gonna reset our first Ridge here, much lower flush with the grass ha now we originally talked about the design we wanted to have it higher than the grass for drainage.
So what we’ve just done is we’ve decided that, because there’s, so much backfill to go on after we’re done with the pad. We’re gonna dig out the first 8 10 inches of grass around the perimeter and put in some River stone to fill that up.
So that way the ground has a natural drainage around our slab. We can accomplish the same thing doing that way and it also helps to remove the amount of aggregate and work that’s. Is necessary to fill this hole.
Oh let’s start all over again. Ok, so now we basically have our frame all figured out one last step we have to do with the framing and that’s square, it all off and then put in our posts. We want to add a couple of little 2×2 stakes.
Just around the perimeter to help keep things from flexing, underneath the weight of all of the aggregate and Samantha we’re putting in here other than that we’re, pretty much good to go. We have some reinforced steel that we’re gonna put in as well after we put in our stone, and that is going to be just to provide this slab with some strength because we do have for season weather here and when the ground Freezes it, ll help hold it in one piece and it.
l rise and fall together in the wintertime and that’ll be really important because basically it freezes around the outside first and as the frost line creeps in the ground starts to lift. And you want your slab to lift together and then settle.
The other, so the reinforcement I am on anything that outside is super super important now to square this off. It’s time to get a little bit of Pythagoras theorem going. I know that sounds scary, that’s, math right.
So what we’re looking for is combinations of 3 4 & amp 5, so 3 feet on one side 4 feet on the other side, then the other side of that triangle should be 5. So if we go 6, 8, and 10, that’s, what we should be looking for Wow I’m, only a quarter inch off and since it’s, a slab and it’s outside.
I think that’s about a square, I need to make that today, fantastic eyeballing job, a 1 on the short side 2 on each of the long sides. 1. On that short side, hang out extra ones. Yeah, we’re, just gonna drive them in here that works so back here the grounds a little tough.
So I made myself a little Dracula. Snake gotta love having a skill saw on the job, and here yeah that’s. Gonna work that’s, gonna be awesome. The best thing about concrete folks. It’s, not art. It’s just science, so I’m just gonna backfill this dirt here that we pull out of the way back to where it came from, and then it’s time to get the wheelbarrow out and get the Get this stone shoveled in here before you know it: it’s gonna be time to pour concrete all right now.
What we have here is 1/2 inch clear stone and you’re gonna find most cases residential. They’re gonna drop this off in your front yard, and you’re gonna have to bring it back here and you can either bring it back when it’s time to fill the pit or you can Do some of this work in advance? So just remember: when you’re ordering stone delivery, make sure you understand the context of the contract.
Are they dropping it at the end of your driveway so that you can’t? Get your car out make sure it’s, your prayer, prepped, and ready to go for that because most cases, these delivery services are just dropping at the driveway and go, and it only takes them less than five minutes.
If you’re, not paying attention, they’ll, be done and gone before you realize it. He got a lot of shuffling to do, but in order to go pick up the kids from school and just keep in mind to the cost of the stones to yard purchase thirty-six bucks, it’ll be it.
Ll vary depending on your region, but it’s about the same kind of price right and it’s, the delivery that costs them money. But if you were to bring this much stone back in bags from a building store, it would cost you maybe four or five hundred dollars the same amount of stone if they packaged it in plastic.
For you, so it’s, not that kind of money. You can buy yourself. A handy dandy wheelbarrow like this with two wheels and it’s, so much easier to work with the did you do so. I’ve got about twenty trips of the stone, and then we’ll be able to set rebar.
Just remember one of the advantages of moving. All your stone onto a blue tarp is when you’re almost done. You can empty out all of what’s left and not leave a mess in your yard. Tada, when, when you layout your stone, don’t be too particular about where there is two inches or three-inch depth.
We’re just trying to get it in the ballpark. Remember we’re, putting just a shed on here, so it’s. Not like we’re, supporting the weight of all the entire house. We just want to have it somewhat level make sure it’s pushed into all the corners you won’t, have cement losing out all over the ground.
Okay, so are still grid. Here is four by eight feet: made our box twelve feet wide. It’s kind of a no-brainer. We’re gonna put in three now the reason I’m, putting it primarily to the front is that in this shed, our design is the front couple of feet are going to be exposed to the elements where the back is Only inside the shed and honestly if we get a crack in the floor in the back of a shed, it doesn’t really matter, but upfront.
We really want to do everything we can do to make sure that this stays in one piece. We are all ready to mix our cement now. I call me old-fashioned, but I like to bring my work to where I’m working, so we set up our mixer in the pit with our concrete and we’re gonna bring the water over here and we’re just gonna fill left to right front to back so every couple of feet at a time and we’ll screed it and then we.
l move the machine over after we’ve deleted some bags and we’ll just keep doing that until we work our way out of the pit. Now I think we’re gonna need a lot more concrete than we see here right now, but it’s just nice to get started where it’s.
Convenient remember: read instructions back of the bag, says takes two-point: seven liters of water for every bag of concrete. This mixer is a one bag at a time deal and it’s really simple. We put the contents in here water first concrete.
Second, open up the pour it out on the ground, rake it around. Rinse. Repeat: as April Wilkinson was hey. We’re gonna. Do that probably around forty-five fifty times and then we’ll. Have a nice finished pad? We’re, also going to smooth it out as we go, so we’ll screen it, and then I just brought whatever tile travel.
I had to lay around. I got a nice flat, smooth edge on it and we’ll. Give us the concrete, a nice smooth finish before we move on too far. So anyway, we’re, just going to use this measuring cup to figure out our two-point.
Seven liters make a black mark on our pail so that we can do the same thing over and over again and have some continuity with our concrete, real life. Is that simple, sometimes? We’re gonna work with that.
Alright, now we don’t need the picture anymore, but we do need a black marker and find a level spot Wow there. We go that actually shows up from the inside okay beautiful. So now we’re gonna give this machine.
Its inaugural run now max pick this up at a local store and it was a floor model. It did not come with instructions so bear with us. While we try to figure out how this thing operates, let’s, see we just push the green button, see what happens.
Oh yeah, alright, we’ll. Get this bad boy turned on. We do not have the ability to lock this in place. I think this is gonna be a long day that’s, not so bad. Oh, it has a mind of its own. This is awesome just going to put on a bit of an angle here so that it’ll mix thoroughly through, all right Wow, I’m thinking.
We’re gonna have to do this on a time-lapse video, so I can get max to help me. This is a two-man operation, so I think, obviously, the 2.7 liters per bag. Those are directions. If you’re mixing it by hand in a wheelbarrow using this kind of machine, you’re gonna use a little bit more water or it just won.
‘t won’t mix up properly part of that’s cuz, it’s leaking, but I think part of its just the nature of how this tumbles anyway, that’s. All right, let’s, just get at it, because there that’s, a lump of cement right there and we got to get moving this thing around.
So you can see we are almost halfway through mixing our concrete. It’s been a little over an hour just wanted to take a minute now and discuss some of the techniques that we’re using here I figured it was easy for you to see the process and then we could discuss it.
So it kind of made sense, since we are using a 16-foot piece of lumber as our screed board, and it basically runs from Ridge to Ridge and creates a flat surface and just like when we’re, doing drywall, mud or any other kind Of finishing, we start from rough and push towards the finish.
Okay. Now, this is a lot easier with a second person like you saw in the other footage, but now he’s holding in the camera. That’s the process, once you get done to a certain point where you don’t have holes to fill.
You just jump to the other side and then come back with a lot of movement, and you can see that’s. How you get your surface if you get any potholes or that sort of thing just takes a handful shove it in and go again? Okay, it’s that simple! Once we were done, our screeding, I was just taking my trowel, and this is actually used for doing tile work, but what it has it.
It has one straight edge right here and I’m using this to act as my float and you’ll see so when you run it over. The surface magically makes everything smooth all right after about 45 minutes. The concrete sets up and then you can just take your Big Shot, broom, and lightly drag it across the concrete.
Now, if you have big nasty chunk of debris, that kind of wrecks the look, no, that puts a texture on the concrete so that it’s, not slippery in the wintertime or when it rains and generally it makes all of the little ripples go Away so this isn’t quite as old, and you can see when I run that broom it doesn’t, okay job, but it’s, grabbing chunks of rock and pulling it up out of the cement.
And you don’t want that. So, if that happens to you, follow us out, take your trowel smooth it off again, give it another 15 or 20 minutes then come back to the broom. You’d be good to go. Call me crazy, but when I’m working out in this kind of heat, I like to wash everything up, but once every hour or so it just makes it a lot easier, in the end, nothing’s baked on.
Besides, on a day like today, a little bit of spray off the hose never hurts so there we go that’s, all the tips and tricks for working with a cement slab that I’ve got for you, the only other thing We’re going to do is at the end of the video we’re, going to come back tomorrow and we’re gonna hammer off all of the boards and reveal the finished slab.
So we’re gonna get back to work now and turn the camera off and we’ll catch you in a minute, okay! Well, we’re back out on their pad here. This is pretty awesome. It’s been a few days and, as you can see, there was a fence company that came by and put up the fence between the neighbors and that’s.
Why we gave this a few days before we got back, wanted to make sure that they had a chance to get everything done, and get out of the way we’re just back here today we got to take out all of our supports and Pull off our boards.
Ah, here we go there we go yeah. I do have scrutiny, fantastic, just a little bit of a vibration that’s. All it takes and you can pull these things right out. We got ourselves here, we go. The irony is, we recently only had 50 bags wasn’t enough, so we went and grabbed another ten, and this little one piers that represents the extra boy, no have talked about measuring closing all right.
Here we go my assistant and I are out here taking a look at the pad now I just wanted to go over a couple of basic details. This is a 10 by 12-foot slab. It took a full yard. Sorry, a full ton of gravel and 60 bags of cement to get this finished so give you an idea of the kind of volume you’re.
Looking at for a 3-inch pour you can use that sort of math. You can also go to the stone yard and you can give them the size and square footage and the depth that you’re gonna work with and they’ve got a little calculator on their computer and they can formulate your Your stuff for you, this was actually poured over two days because we were running short.
So what we did is we poured this whole section and across the front and then after it is set for about an hour and a half, we managed to broom that and got a pretty good look the second day this was done so that’s why you see the line it doesn’t really matter.
We’re building a shed and it’s going to be 7 by 10. So all of the second parts of the pour is gonna be inside the shed. We’re, not concerned visually. This is still going to be stunning and just really glad this little machine over here was awesome.
We’re really pleased because we didn’t expect it to make it through the whole process. We thought would be mixed in the last few bags in the wheelbarrow, but it held up really great so kudos to that machine.
If you’re in the market for a cement mixer these little one bag at a time, the good little machines – and so if you’re wondering about the Dunsworth I the funny story here is max was actually inspired.
Do cement work. He was watching a video by an actor who was in the Trailer Park, Boys series and he lives out east and done a bunch of concrete work at his house, and so Max was like. I got to get me a cement mixer and I’m gonna do some concrete work so when the idea came up to put the shed together max was like.
Oh, I’m gonna make this huge pad from my house, and so he bought this machine, and so since it stood up the test of time, he’s, nicknamed it the Dunsworth in honor of the actor. So I think that’s, pretty darn cool.
So now the pads complete we’re ready to go to our next step. The weather is favorable and it’s, time to start framing. You’ll need two different kinds of wood: one is regular spruce, and the other one you need is pressure-treated, okay, and the reason you want pressure-treated lumber is because the building code allows for you To use this as your bottom plate in direct contact with concrete so that it won’t suck up the moisture through the concrete and into your wall.
When you build like this, you actually have a moisture barrier between your concrete and your spruce so that the mold that’s naturally occurring in wood, cannot grow. This is very important because, whether you’re outside on a concrete pad like we are, or you’re framing in your basement, it’s, the same science and if you build like we were gonna show you today, You’ll be able to frame anything in your house.
So one of the things we like to do on our channel shows you techniques and tips and tricks that involve basic tools, because most homeowners or do-it-yourselfers don’t, have an array of tools to work with so, for instance, and a lot Of framing videos, you’ll see people working with the automatic nailing guns and those are great and if you got one, by all means, help yourself, it’ll speed things up a little bit, but the reality is they’re running around four hundred dollars and if you don’t, have a good compressor or you don’t, have an extra four hundred dollars to put into the cost of building just a shed.
You don’t want to go and buy one of those things, so we’re, going to show you two techniques, basic drill, and screws, and we’re, also going to show you how to use hammer nails. I know it’s a little old school, but the fact is: is it’s about the same speed? So whatever you’re more comfortable using we’re gonna show you how to do both, but before we get started, let’s.
Just think you want to have the design of your shed. Now. Typically, I’ve seen all kinds of sheds are built like barns. All the walls are the same size, they have gable ends and they’ve got a peaked roof like this, but the reality is that’s.
A lot of work to build a shed with that kind of roof design. So what we’re gonna do is a little bit different. So I’m gonna give you an idea. What’s going to happen? Let’s say from this post to this post is the side of our shed, and this is about an 8 foot tall.
We’re gonna build it with the wall on the backside of the shed at 7 feet and the wall at the front at 8 feet. So we have a slope that will facilitate our removing of the water to the backside of the shed, but it also makes it really easy to build and you only have to build one slope for the roof.
This is why I’m, going to show you this technique today, because building a shed, doesn’t have to be a work of art, it has to be functional and the first rule of design is to make sure it functions there’s, no need to make all kinds of extra work and all kinds of extra design elements and building a shed with two different slopes on the roof.
So by doing one slope, we can actually save a lot of money because we don’t have gable ends that we have to use extra materials and throw in the garbage and that’ll. Save you time and money and it’ll.
Give you a great look, so we’re gonna finish this off with a nice little pressure-treated, one by five running around the edge of the roof. You weren’t gonna see any roofing. It’s. Gonna be sleek. It’s.
Gonna be sexy. It’s. Gonna function it’s. Gonna be cheap. It’s. Gonna be quick to stay with us, so we’ve just cut our boards. We’ve got our layout here. We’ve got two by fours pressure-treated ten-foot-long, and then these ones we’ve cut back so that our total exterior is 7 feet.
The reason we’re doing, that is our design element, actually takes into place. Our roofers are going to extend out to the front edge of this lab. We have a couple of posts to pick up the weight and you also have a sitting area out front as well, and I’m sure.
The dog will appreciate having a nice cool shaded area to sit all day long. Our elements here are basically simple: gonna have a door in the middle and have a window in each side, and we’re gonna have a cheater door back here that swings open.
You can bring a lawnmower from the backside. The reason we’re doing, that is because, if you can bring the lawnmower in up against an outside wall, you’re gonna actually save a ton of space having to bring your lawnmower into the main door makes everything dirty all The time – and it keeps you from having a clean shed because you need room for removing it around or you’re just always in the way.
So we’re gonna have a little cheat door here. It’d be almost like a hidden door. The little side ramp. We’re gonna build that separately, but let’s, get back to framing. We need to the layout. You need to understand what it is you’re gonna build, so the way you lay it out is simple.
Basically, it’s all about visualization. For us, we’re. Doing have a plan. We’re working off it’s all coming out of here, so we’re gonna go with our 10-foot by our 7-foot. That is simple and we are going to just cut our plate.
Put it in place get an idea. Am I going to be happy with that? Is that is that big enough? Is it small enough once you’ve got all those questions done, then you’re ready to start because of this framing here this plate?
This is the first step that you need the next step you do. Are you make the same frame for the top of the walls and you just get all those cut and laid out as well, so in our effort to try to keep things really simple? If you have a skill, saw, I’m, going to show you a way that you can actually cut all your framing lumber, and then you don’t need to set up.
A chop saw just take your measurement. Put your mark on the wood get your little square here or triangle, as I call it, because it kind of looks like a triangle anyway, on your saw you’re gonna have a linework mark zero, where the blade cuts – and you want To set that up on your pencil mark and then move the triangle right up to the guide right up to the guard, and I’m gonna use this squeezing it like against the frame to be my cutting guide.
So I cut straight through the wood that gets you a perfectly square cut. Nothing ever binds nothing’s ever on an angle, and everything is always perfect because you’re, not freehand, cutting, so that’s, a great technique and if you don’t have a chop saw, and you Want to build a shed, or you want to frame your basement.
You can use that technique. It only takes a couple of seconds. A cut and honestly it’ll say be a few hundred dollars. We have the foundation for her building. Today we have all of our walls top and bottom plate, and now it’s, just a matter of constructing eight individual walls.
So we’ll take our pieces and we’ll set them aside for now. So we have room to build on our pad and then lift everything in place as we go now it’s very important that when you’re framing your wall, you know how to mark it up and it’s easier because we’re using pressure-treated for the bottom and regular lumber for the top.
Otherwise, you should mark it bottom and top just so. You don’t, get confused, especially if you’re, going to be putting doors or windows in basically, what you do is get them flush at the end, you run your tape across it, for anybody who doesn’t have An understanding of building materials: this is where you really need to understand.
The building technique that we use is so that it accommodates the materials that were going to be installing to finish so right here is our 48 inches, and this is really important if our lumber is an inch and a half thick and that would represent the full Thickness of a piece of wood, this is marked to the middle.
Now, when we put on our sheet good is four feet long. We want to have it finish in the middle of a stud, so we can nail it put on the next piece and the hive and nailing surface for that one as well. So when you’re marking this, we’re, going to go four feet on center, so it’s every 16 inches on center.
So all of these are gonna be on red squares. Okay, so you can actually mark the center of all of your sticks, top, and bottom, where all these little red squares are okay and that’ll help make sure that things go well now.
Professional framers would frame it this way they’d. Go like this. Okay mark three-quarters over and then put an X where the wood is. I’ll actually mark the side of the board. Now either one of those techniques works fine.
As long as you have a system that you’re, using make sure that you can finish with the center of the wood on the red square, that is really the whole secret buying a good tape measure. So that you are able to understand what you’re doing without having to do the math as you go along, okay and of course, the end of every wall gets a stick as well.
That’s. What I’m, saying and now this is the center mark. I’m using two different systems here, just to demonstrate if you’re marking a center put the little C on so you remember, okay, that’s. The centerline.
Now, all we have to do is add up how many pieces we have. I remember a back wall is going to be seven feet at finish, so we have to take our seven-foot measurement minus the bottom plate and a top plate and a second top plate, and the reason we use two top plates is that when I stand this wall Up you’ll, see the frames for 16 inches apart.
There’s, a lot of weight coming from the roof and on this top plate, and if you don’t line up all of the rafters of your roof.